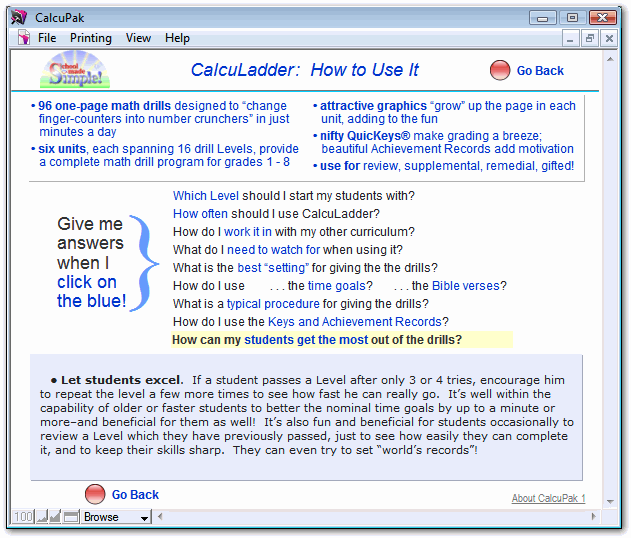
How to use your CalcuPak
Contents:
 Step 1: Select a Unit
Step 2: Browse, Print Materials
Step 3: Check the SmartGuide™
Step 4: Enroll Your Students
Step 5: Set Up the CalcuClock™
Step 6: Time Your Students
Step 7: Score Your Students’ Work
Step 8: Access, Print Student Records
Step 1: Select a unit covering the subject(s) you want to practice
|
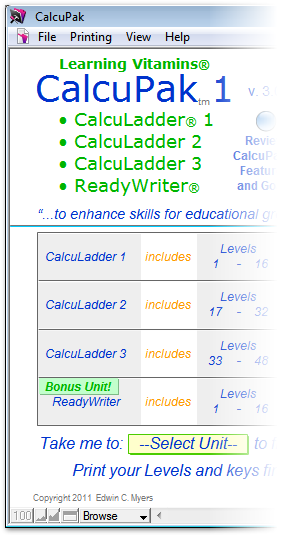
• Order, download, and install your CalcuPak. • Launch your CalcuPak. Your CalcuPak window shows the units in your Pak and the subjects they cover. • Click on the --Select Unit-- button to choose the unit you want to print drills and/or keys from. 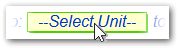
• CalcuPak 1 includes CalcuLadder 1, 2, and 3, plus ReadyWriter— • CalcuPak 2 includes CalcuLadder 4, 5, and 6, plus AlphaBetter— |
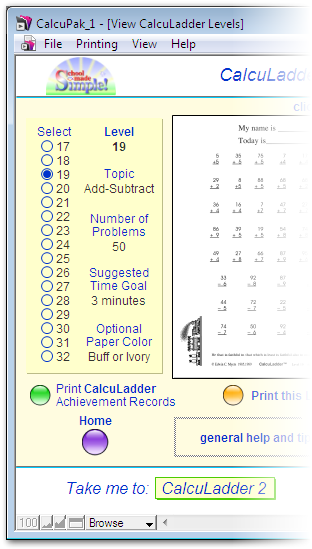
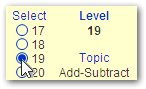
Step 2: Browse & print the Levels + Keys you need
|
• After selecting the unit you desire, browse the drill Levels and keys in that unit. • Click and Print Levels, • The beautiful, high-resolution prints are a pleasure to use with your students! |
 Other units are just a click away.
 QuicKey® grading keys,
  and Achievement Records
  in the quantities you desire.
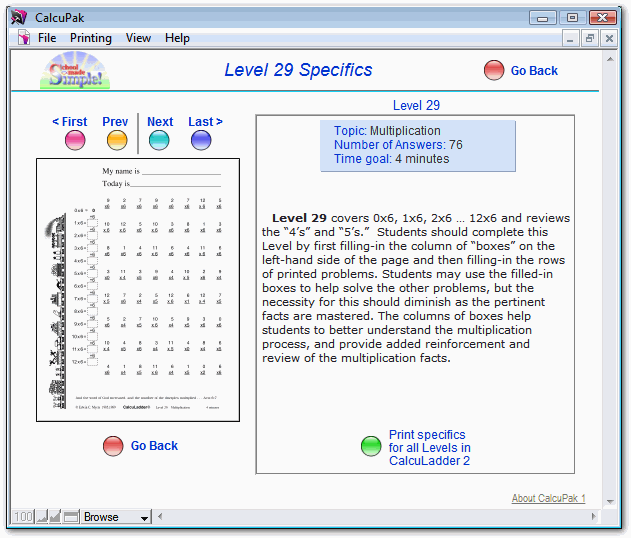
Step 3: Check the SmartGuide™ for teaching tips
|
• As you browse through the drill Levels, click the handy SmartGuide™ buttons for key guidelines, plus practical hints and tips on how to use & administer the drills. So helpful! |
||
|
• In addition, the SmartGuide has specific information for each drill, including new facts and skills covered and specific teaching reminders keyed to each drill. |
|
||
Please Note:
Steps 4-8 describe the use of the 'Home Edition' CalcuPaks. The timing features of Teacher's Edition and School Edition CalcuPaks provide other options.
Step 4: Enroll and activate your students
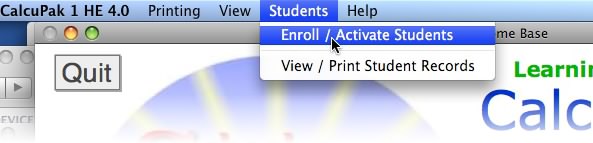
Before timing students, you must enroll and activate them. To do this, go to the menu bar, click the 'Students' menu, and select 'Enroll/Activate Students', as shown below.
NOTE: The CalcuPak menu bar on a Windows computer is located inside your CalcuPak application window. However, the CalcuPak menu bar on a Mac computer is NOT inside the CalcuPak window, but rather is located at the top, left-hand corner of your desktop screen, as part of the "Apple Menu."
Enter your children’s first and last names and birth order on the enrollment page. Be sure to click the 'Active' button for kids you want to time. Up to ten students may be enrolled, and up to five may be 'active' at once.

Click on the 'Time Your Students!' button in the lower right portion of the enrollment page to go to the CalcuClock™ timer.
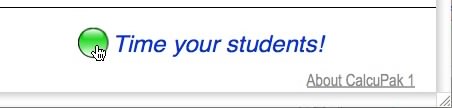
Note: Once students are enrolled and active, click the 'Enroll & Time Your Students!' button on the CalcuPak home page to go straight to the timer.
Step 5: Set up the CalcuClock™ timer
If you have not enrolled and activated some students yet, please go back to the previous step and complete it first. Then read the following information:
A. CalcuClock Timer Overview
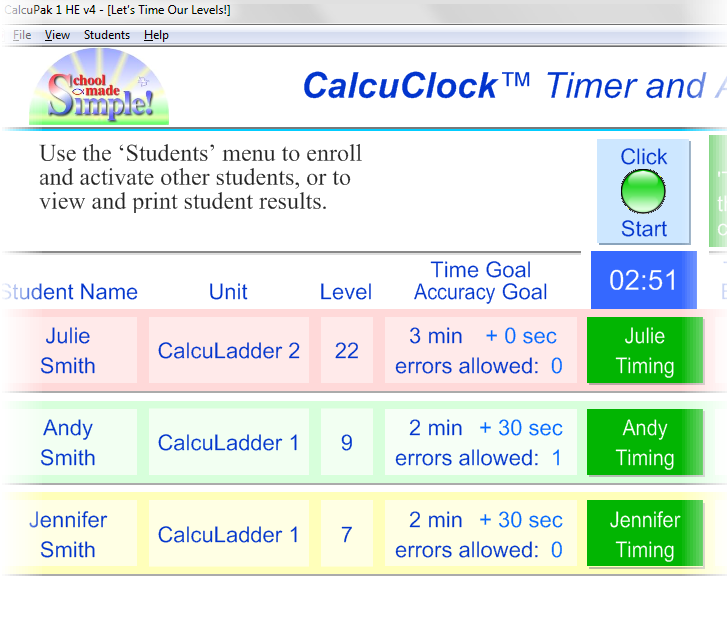
One of the great CalcuPak features is the CalcuClock™ timer and analyzer. With the CalcuClock, you can time up to five students at once, each on their own drill Level. As each student finishes, you record their time with the click of a mouse! The CalcuClock automatically computes a Speed Quality Score or SQS for each student.
Once your kids are finished, grade their papers with the handy QuicKeys® you’ve printed out. Then enter their number of errors on the CalcuClock screen. The CalcuClock automatically computes an Accuracy Quality Score (AQS) and an overall Performance Quality Score (PQS) for each student. These are displayed numerically and graphically. Clear each student’s results for timing again.
| NEW in CalcuPak Version 4.0! |
Now you can save student results in the new CalcuKeeper™ archive to be reviewed later or |
| B. How to set up the CalcuClock: | |||

|
• Access the CalcuClock by clicking the ‘'Enroll & Time your students!'’ button or the |
||

|
|||
|
All 'active' students from the enrollment page will apppear in the CalcuClock page. Enter information for the drills your students are taking, as follows below: |
||
|
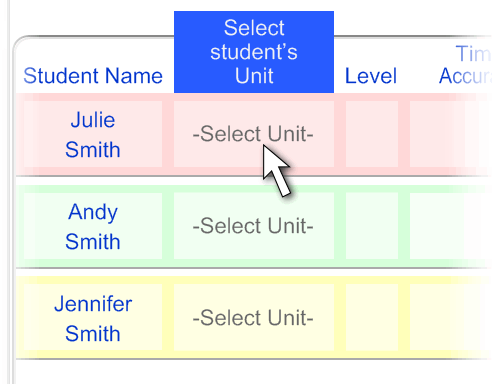
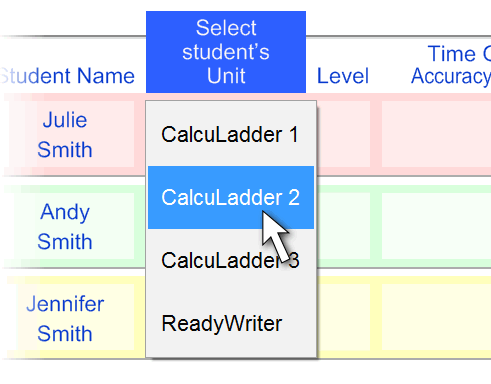
• Select the student’s unit. |
||

|
• Select the student’s Level. The CalcuClock ‘knows’ the suggested time goal for each Level, how many answers are possible, and so on. |
||
|
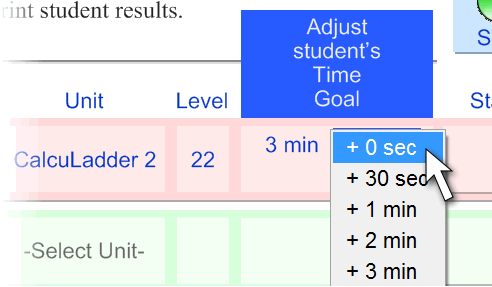
• Enter any adjustments you want to make for your student’s time goal on this Level. Usually, you should start with zero seconds adjustment. |
||
|
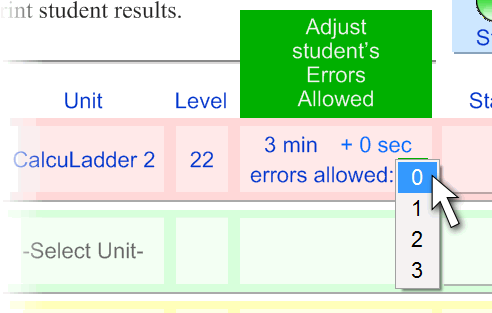
• Enter any adjustments for your student’s allowed errors on this Level. Usually, you should start with zero errors allowed. |
||
|
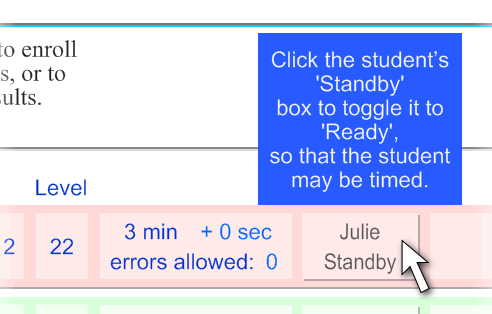
• When you have entered all information for a student, the CalcuClock places that student on ‘Standby’. |
||
|
• Click the ‘Standby’ box for each student you want to time, to place that student on ‘Ready’ status. Only 'Ready' students will be timed. Now, let’s go to the next step and time our students! |
||
Step 6: Time your students
|
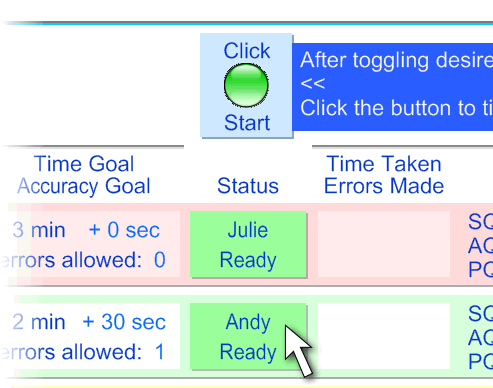
• Say, “On your mark, get set, go!” Then click the Start button to begin timing. The ‘Ready’ boxes will change to ‘Timing’ boxes and the clock will start to run. |
||
|
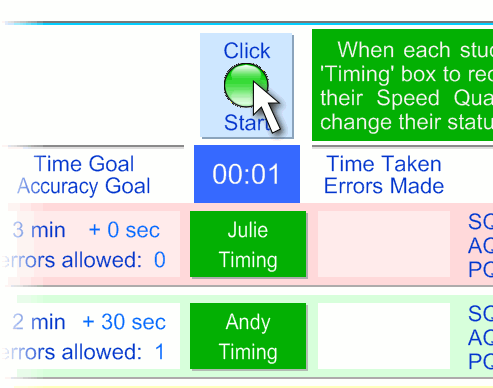
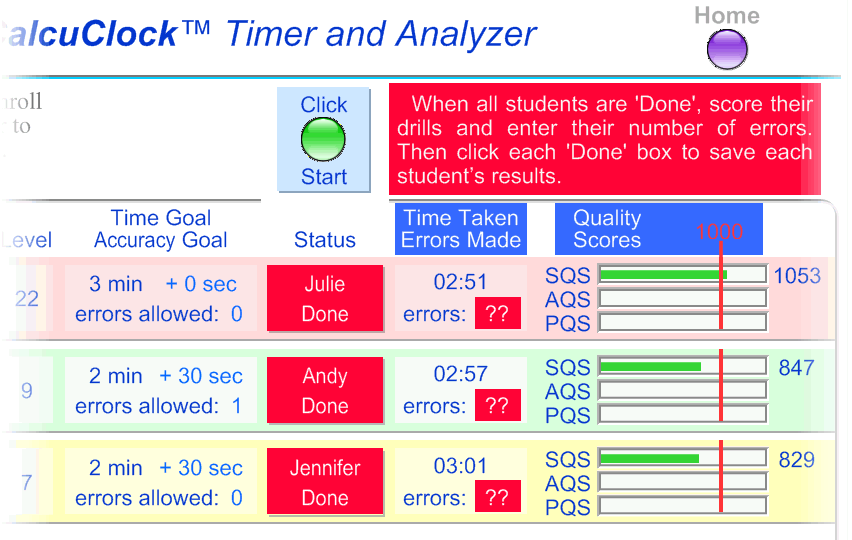
• As students finish their Levels, click their ‘Timing’ boxes. The ‘Timing’ boxes will change to ‘Done’ boxes and each student’s time will be recorded. Notice that Julie’s Speed Quality Score is greater than 1000 because Julie finished her Level faster than her time goal. |
||
|
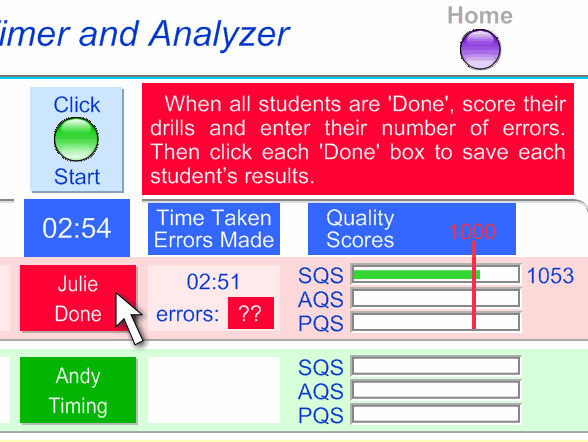
• When all students have finished their Levels, the CalcuClock panel looks like the illustration below. Note the question marks indicating that the number of errors should be entered for each student. That's what we will do next. |
|||
|
|||
Step 7: Score your students, save their results
|
• When all students have finished, score their Levels with the QuicKeys® you’ve previously printed. |
||
|
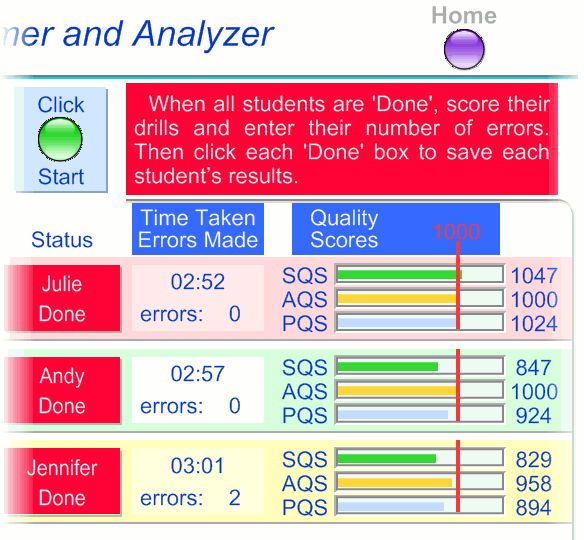
• Enter each student’s number of errors on the CalcuClock page. Their Accuracy Quality Score and Performance Quality Score will display on the screen automatically. |
||
|
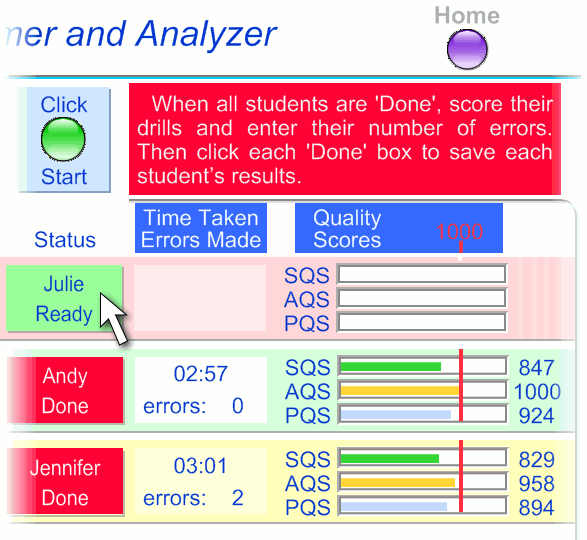
• Once all errors have been entered, click on each student’s ‘Done’ box to return that student to ‘Ready’. When you do this, you will be given the option to save the student’s results for future print-out. Clicking the ‘Standby’ box repeatedly will toggle it between ‘Ready’ and ‘Standby’. |
||
Step 8: Access and print records as needed
|
To access, view, and print student records from the CalcuKeeper™ archive, select 'View/Print Student Records' from the 'Students' menu. On the CalcuKeeper page, choose the student, unit, and Levels of interest. Then click the green 'Print Results Now Showing' button to print out professionally formatted reports of student progress. |
|||

|
| CalcuPak 1 and CalcuPak 2 Home Editions are just or order both Paks and save more! Teacher’s Edition and School Edition also available with an extended copyright release for your students! |
||
 ...Go to the previous page